How to Install Windows 10 on macOS Big Sur without Boot Camp Using VirtualBox

Both Windows 10 and macOS Big Sur are the latest operating systems for Windows and Mac users respectively. Meanwhile, if you have a MacBook running on macOS Big and want to have and use the Windows 10 operating system at the same time alongside your macOS Big Sur then you have come to the right place. Learn here the easiest method to Install Windows 10 on macOS Big Sur without Boot Camp Using VirtualBox.
To set up a virtual machine (VM) on their Macs, many people typically use software like Parallels or VMware Workstation, or Player. To do this, VirtualBox is a nice, free alternative. Plus, in just a few minutes, you can install and set it up.
Any operating system (OS) on your current system can be run by VMs. You can use VirtualBox for free simulation, whether it’s for disaster recovery, code testing, or just some fun exploration. In order to install Windows 10 on macOS Big Sue via VirtualBox, you will need to download both the VirtualBox and Windows 10 ISO File.
How to Install Windows 10 on macOS Big Sur without Boot Camp
So, to install Windows 10 on macOS Big Sur without Boot Camp, you will need to use a virtual machine called” Oracle VirtualBox.” So follow the following steps to install Windows 10 on Mac:
1: Install VirtualBox on macOS Big Sur
Step 1. First, download the latest version of VirtualBox for macOS. Click OS X Hosts and the download will begin automatically.

Step 2. When downloaded, open the new DMG file, and then double-click VirtualBox.pkg to open the installer.

Step 3. Click Continue to proceed through the installer.
Step 4. Click Install. If asked, type the password for your Mac and then click Install Software. However, If you want to change where and how the VirtualBox application installs, click Change Install Location.
Step 5. Click Close when the installation is completed. In the meantime, you can also click Move to Bin since you no longer need the installation file.
If you haven’t given your Mac permission to install programs from Oracle previously, it’s highly likely the installation will fail.
To grant permission, click the magnifying glass at the top right, type Security, and then press Enter. Alternatively, you can click Applications > System Preferences > Security and Privacy. Near the bottom of the General tab, you should see some text that says software from Oracle America, Inc. was blocked. Click Allow, and then reinstall.

2: How to Download the Windows 10 ISO File to Install Windows 10 on Mac
Apart from installing VirtualBox, you also need to download the Windows 10 ISO file. from the Microsoft website. You can download it straight to your internal hard drive.
Step 1. Go to the Microsoft Windows 10 ISO download page.
Step 2. Click the dropdown menu below Select edition and then select Confirm.
Step 3. Click the dropdown menu below Select the product language, again click Confirm.
Step 4. Click 64-bit Download and Windows 10 The ISO file will now be downloaded.

3: Creating a New Virtual Machine to Install Windows 10
Once you have downloaded and installed both the Windows 10 ISO and VirtualBox, open-up the virtual machine and click on the New option. (Open Virtual Box (via the “Applications” folder or via a Spotlight Search).

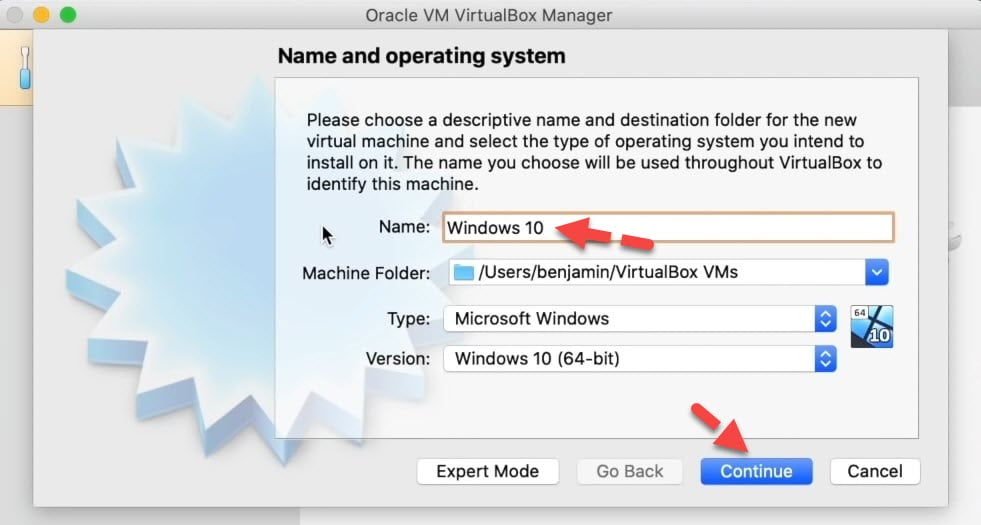
You can name your new operating system whatever you want. If you type the name of any available OS (like “Windows 10”), the “Version” field automatically switches to that OS. You can choose a different Machine Folder to store the VMs. Click Continue.
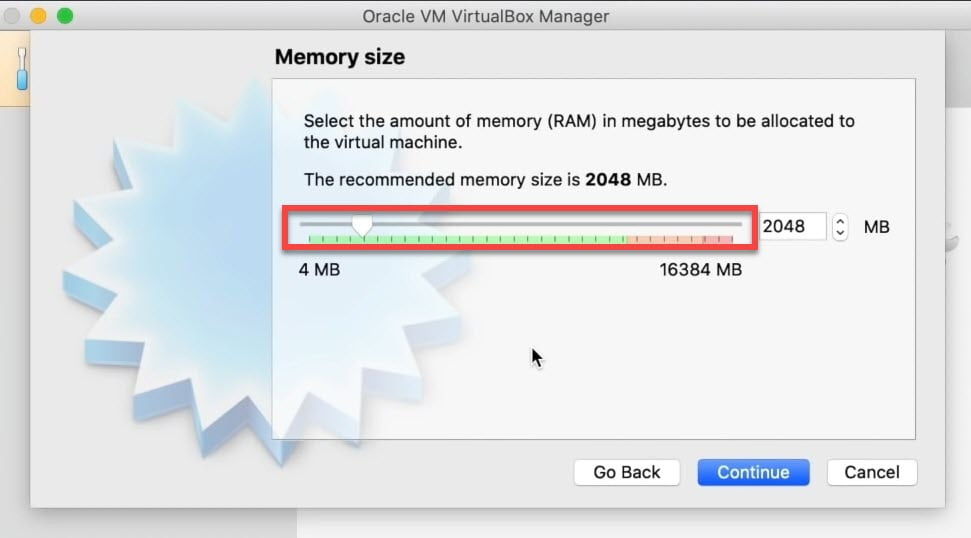
On the following screen, choose how much RAM (the amount of memory) you want to allocate to your VM, and then click Continue. The default recommendation is 2,048 MB, which is enough to run most installers. Heavier code or applications might require at least 2 GB, though. You can always change this later in Settings.
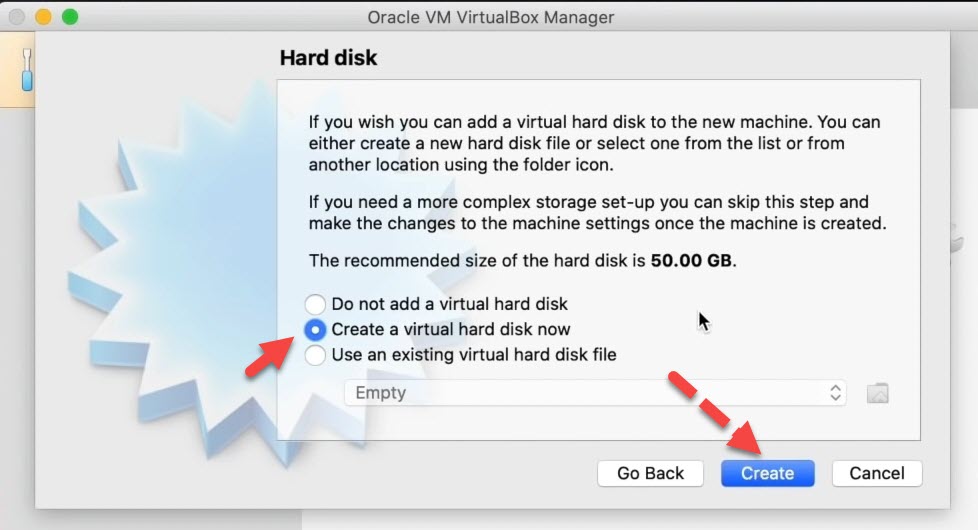
Click the radio button next to Create a Virtual Hard Disk Now, and then click Create.
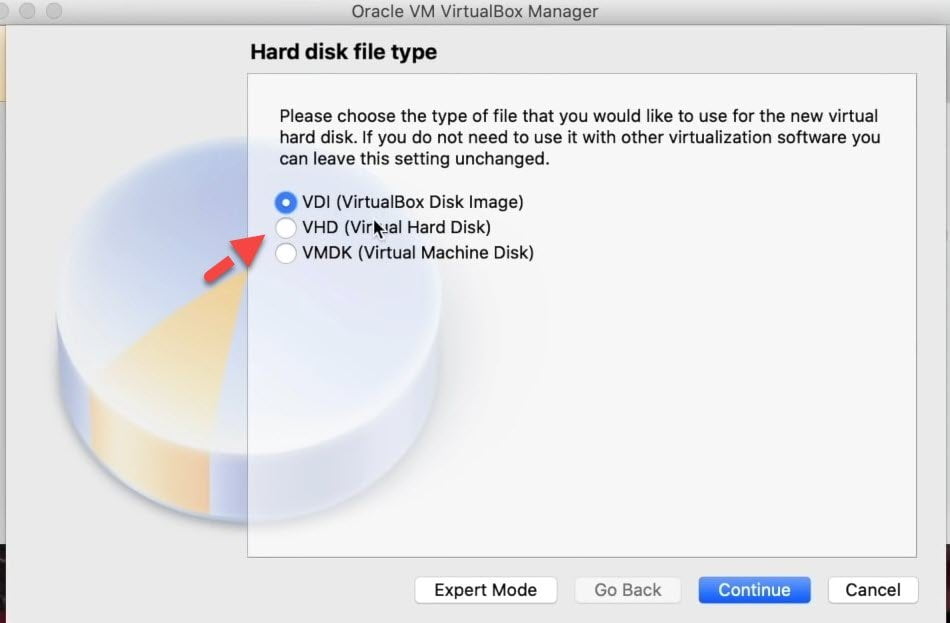
Click the radio button next to the VDI (VirtualBox Disk Image) option, and then click Continue.
On the next screen, if you want a faster setup, select Dynamically allocated. If you want faster performance (which we recommend), select Fixed size, and then click Continue.

At last, you have to decide where to store your VM, and how much storage it needs. If you chose “Fixed Size” in the previous screen, click Create. VirtualBox will begin allotting that space.

4: Edit Virtual Machine Settings
- Once the virtual machine created you need to edit a few settings to have better performance. To do that select the created virtual machine and click on Settings.
- Click on the “System” tab and uncheck the box next to the Floppy disk.
- Click on the Display tab and increase the Video Memory size.
5: Installing Windows 10 on macOS Big Sur via VirtualBox
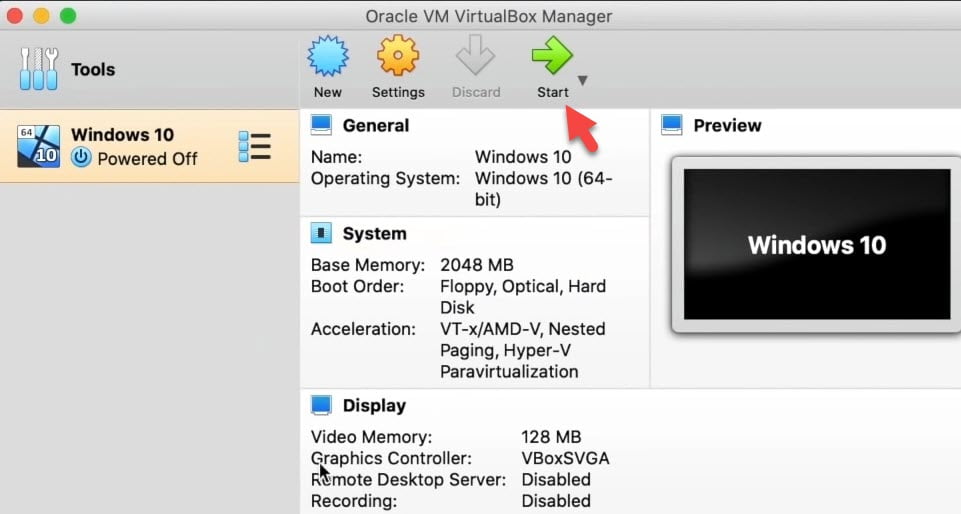
Go back to VirtualBox, and then click Start.
A new window opens so you can do this manually. Click the folder with the green up arrow.
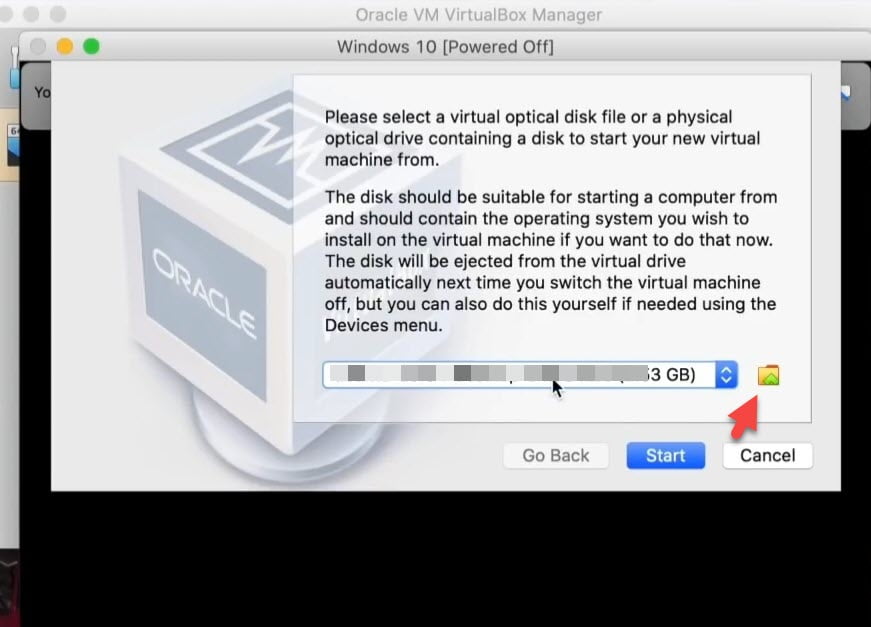
Click on the Add button next to the Create option.
Select the Windows 10 ISO file and click Open.

Make sure that Windows 10 ISO is selected and click Choose.
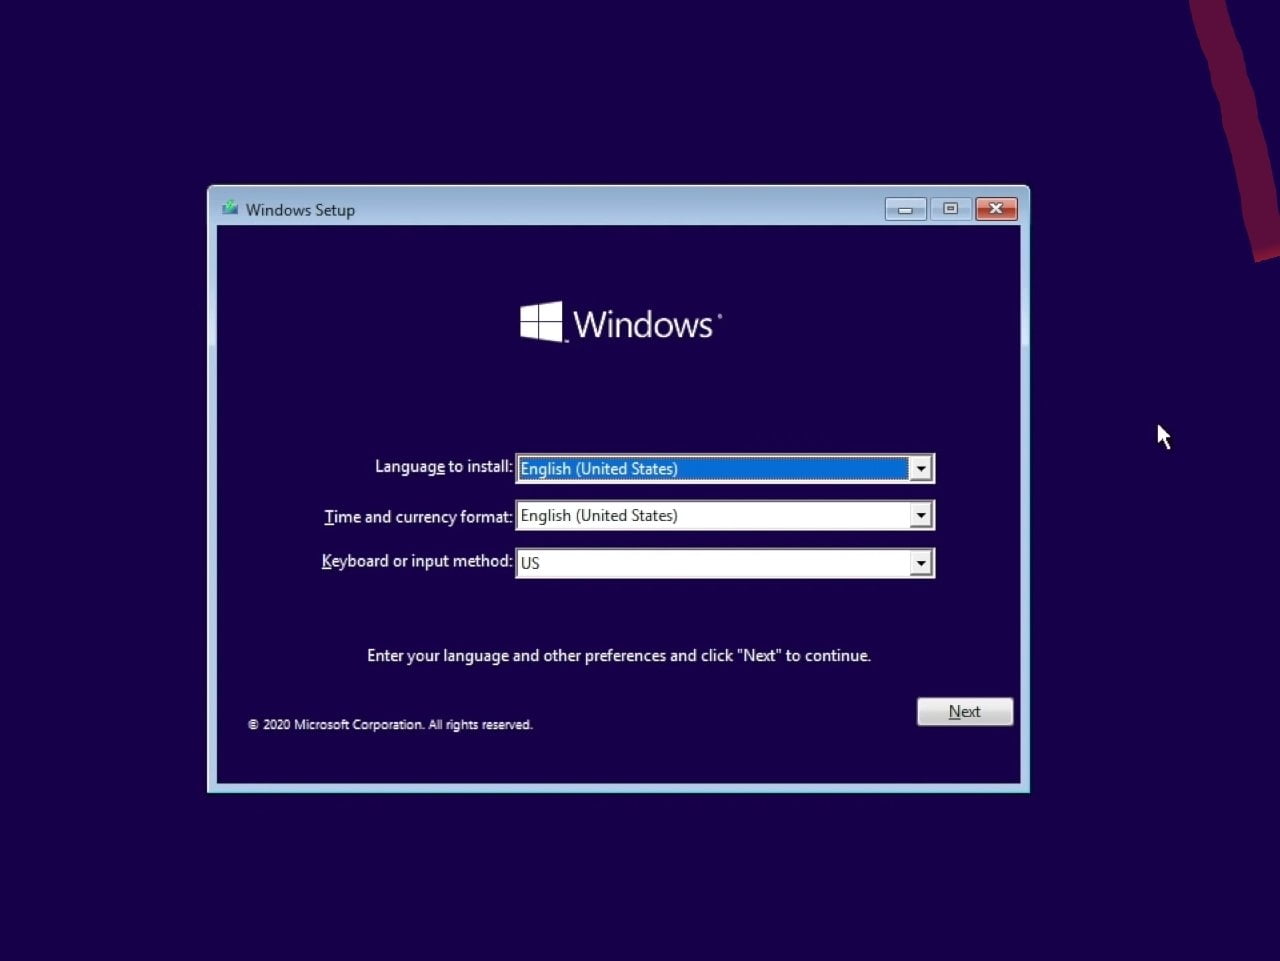
Now, you are ready to install Windows 10 via VirtualBox on your macOS big Sur, Click Start.

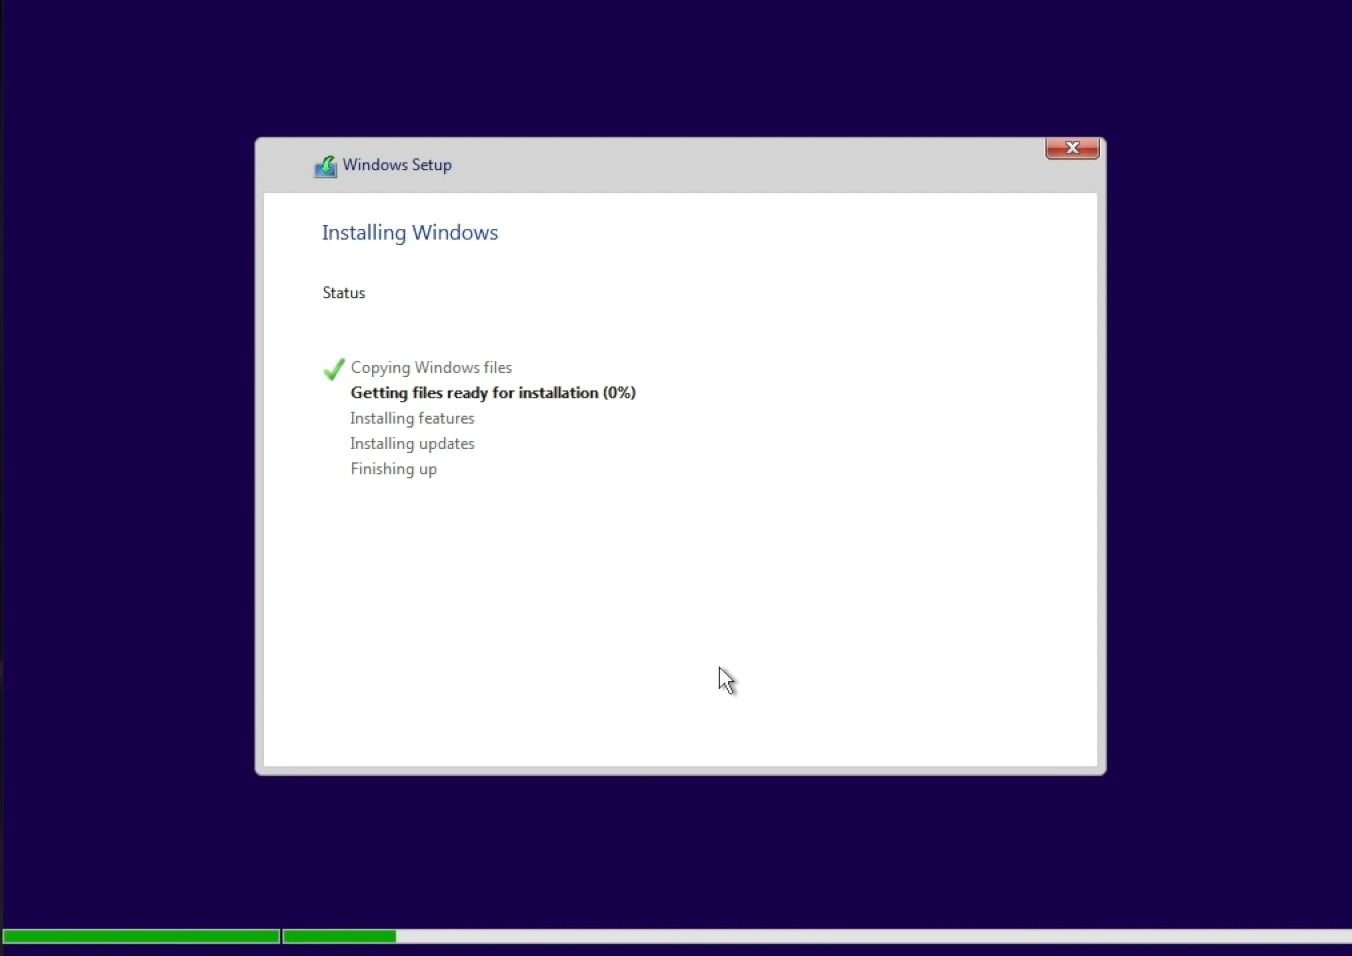
After this, click Next > Install now > Click I don’t have a product key > Choose any Windows 10 version and click Next > Click I accept the license terms and select Next > Click Custom install > Next > Now wait for a while until the Windows 10 installation is completed. Follow the on-screen instruction to finish the process.

Now, you have successfully installed Windows 10 on macOS Big Sur via VirtualBox.

Final Words
That’s it. This is how you can install Windows 10 on macOS Big Sur via VirtualBox. Meanwhile, the process is very easy and it might seem a bit tricky while following the above-mentioned steps but that’s not the case. If you faced any kind of problem feel free to contact us in the comment section below.
Read More: