
As you all know Windows 11 included an “Ultimate Performance” power strategy from Microsoft. It’s based on the High-Performance power scheme, but it aims to squeeze every last bit of performance out of it. Here in this post, we will show you how To enable ultimate performance in windows 11
What is the ultimate performance in windows 11
The Ultimate Performance power plan is a preset power plan designed for high-power systems to provide an additional performance boost. It’s the ideal option for systems like workstations and servers, where every little bit of performance gain counts.
The Ultimate Performance in Windows 11 plan removes polling of hardware to determine whether it requires additional power and allows the hardware to consume all of the power it requires. In addition, all power-saving features are turned off to boost performance even further. As a result, workstations that run on battery power are not offered this option by default because it consumes more power and kills your battery faster.
The Ultimate Performance power plan eliminates the micro-latencies associated with fine-grained power management strategies. Simply defined, micro-latency is the small amount of time that an operating system spends between recognizing that a piece of hardware requires power and delivering that power.
The Ultimate Performance plan boosts performance on systems where hardware is constantly switching between idle and active states. When you play a game, though, all of your hardware already works together to fill the scene around you. The only meaningful improvement may occur at the initial setup, and you may only see a few frames per second increase. However, if you are running video editing or 3D design software that is putting occasional heavy loads on your hardware, you might see more of an improvement.
1) How to Enable Ultimate Performance in Windows 11
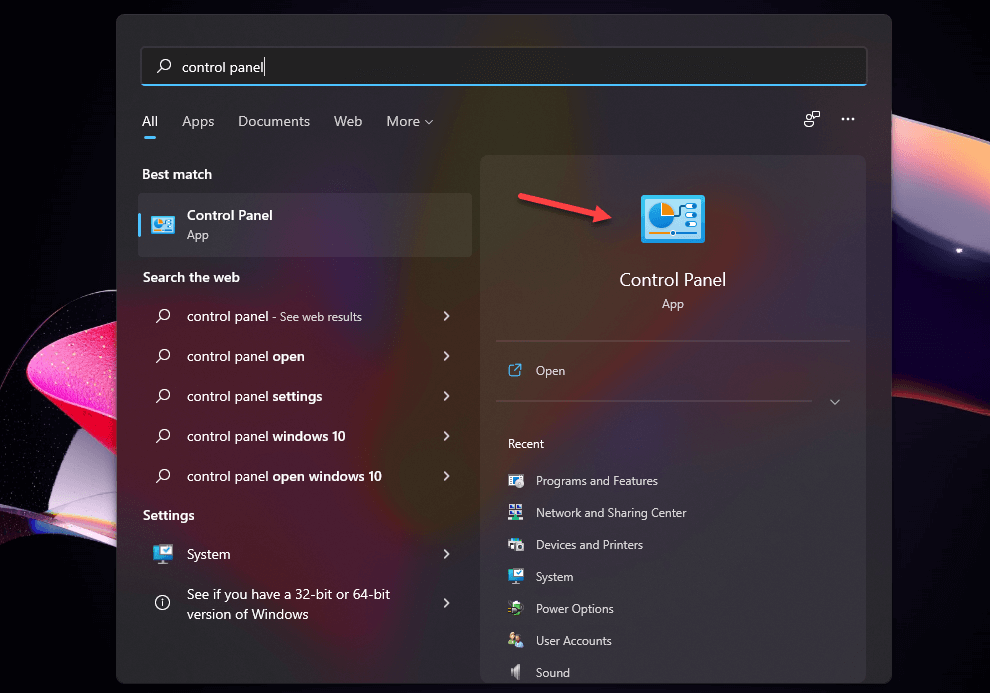
- Firstly open the control panel.
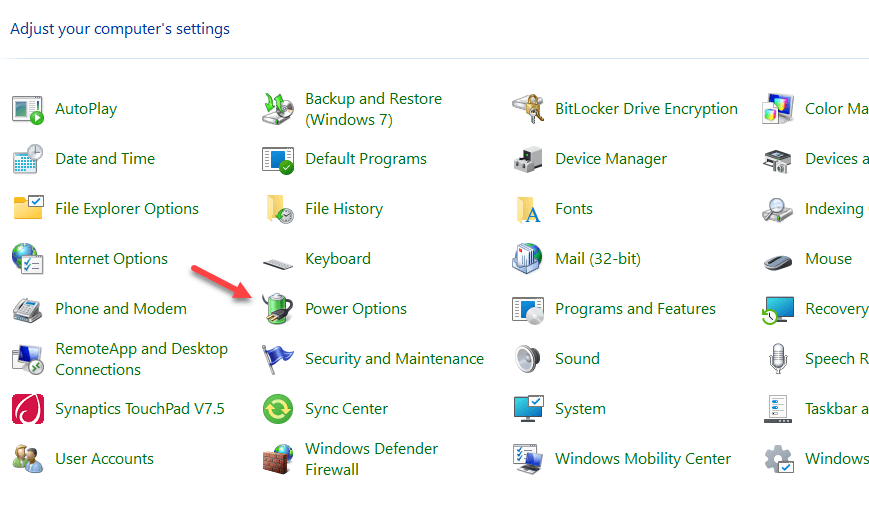
- Then in the Control Panel click on the Power Options.
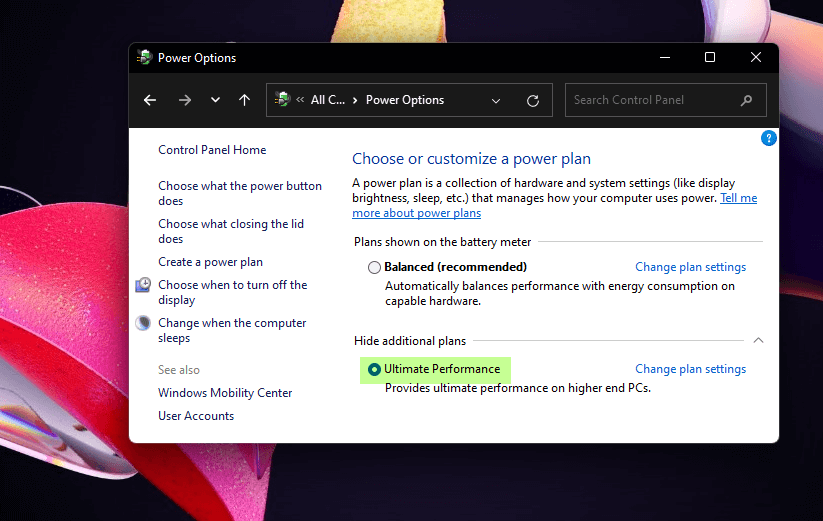
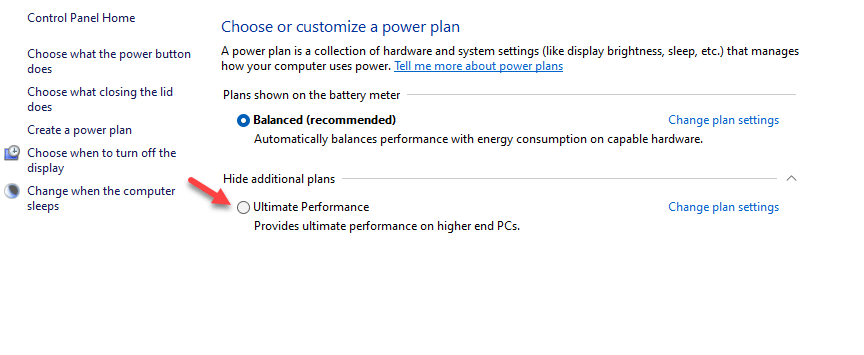
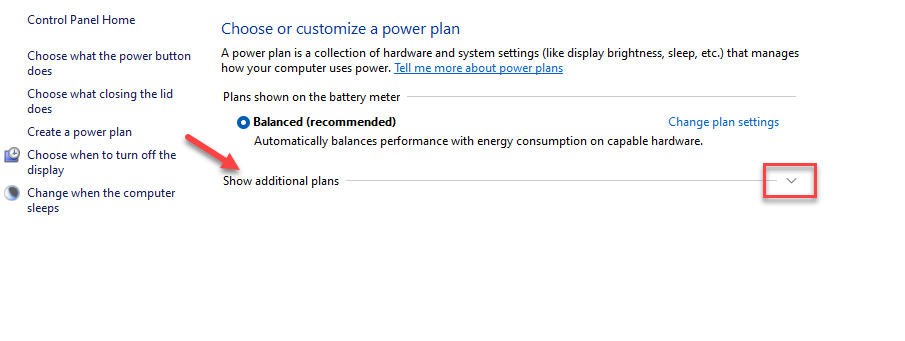
- Now go and click on the drop-down option next to the Show additional plans.

- Here the option Ultimate Performance will show up. You can now enable the Ultimate Performance.
Note: On some devices (mainly laptops, but sometimes some desktops), the Ultimate Performance plan may not be shown in the settings app. If you don’t already have it, you may add it with a simple Command Prompt or PowerShell command. The command is the same in both shells, so use whichever you choose
2) How to add Ultimate Performance in Windows 11 manually using CMD
- Search CMD in the search bar then opens it with Run as administrator.
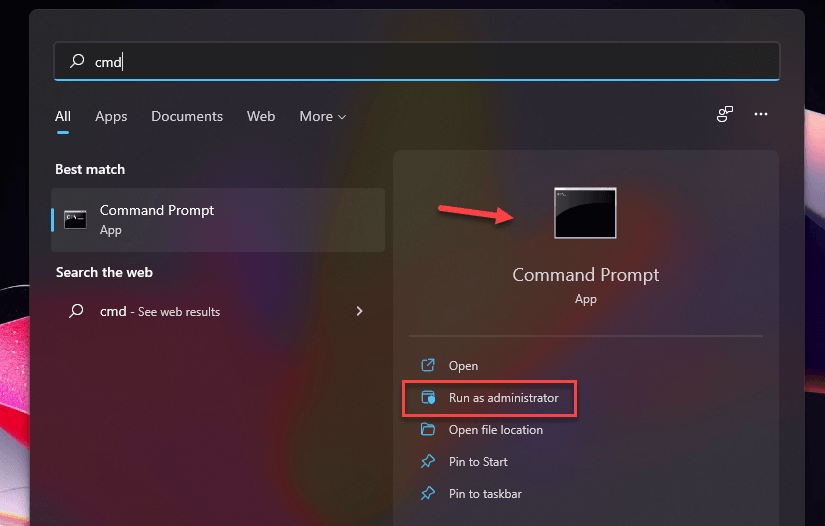
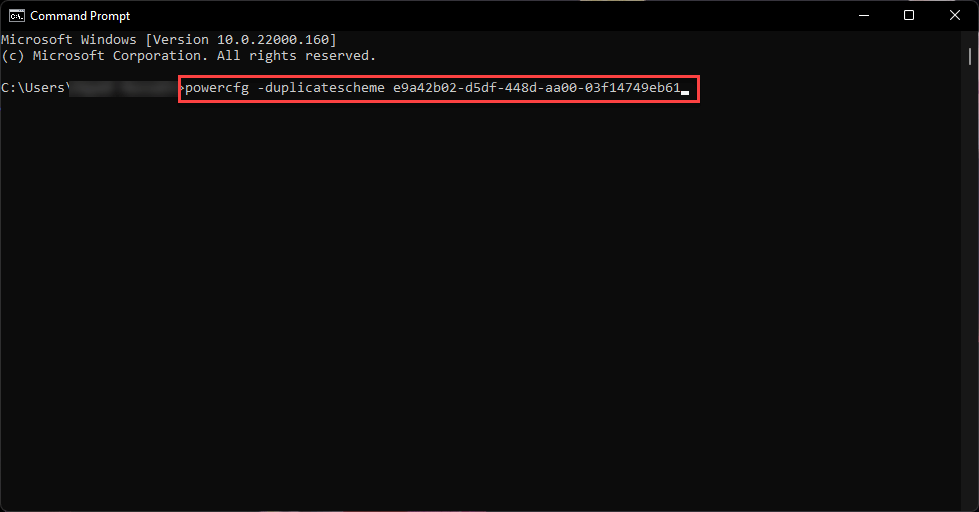
- Now copy and paste the following code in the Cmd (Command Prompt).
powercfg -duplicatescheme e9a42b02-d5df-448d-aa00-03f14749eb61
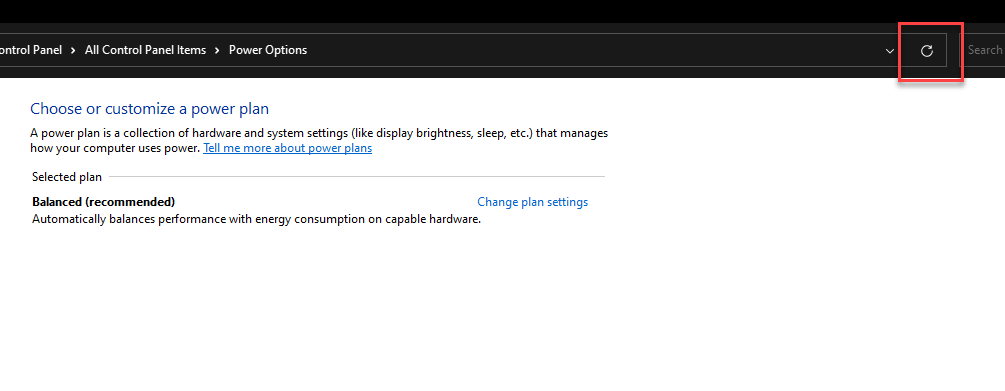
- When done go back to the Settings and refresh the page.
- Now go and click on the drop-down option next to the Show additional plans.
- Here the option Ultimate Performance will show up. You can now enable the Ultimate Performance.

3) Deleting the Ultimate Performance Plan from your System
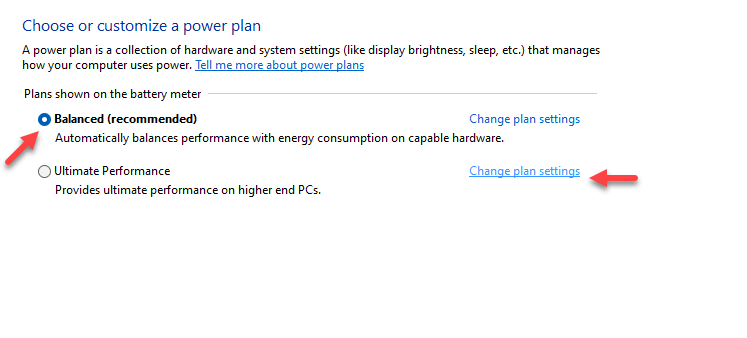
- First, choose Balanced (recommended) after that click on the Change plan settings next to the Ultimate Performance.
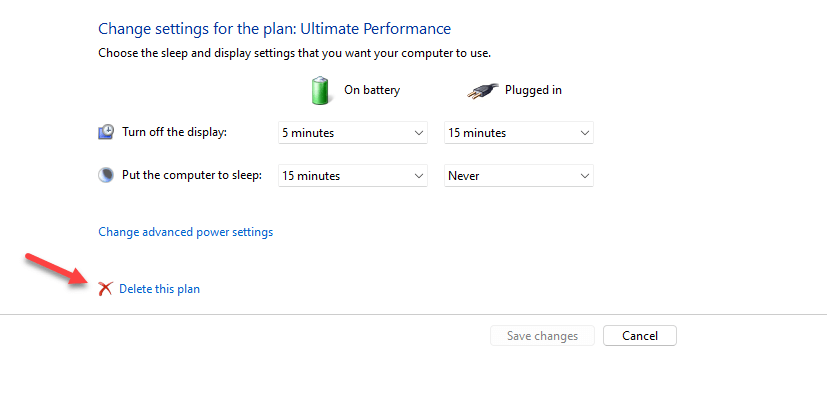
- Here choose Delete this plane.
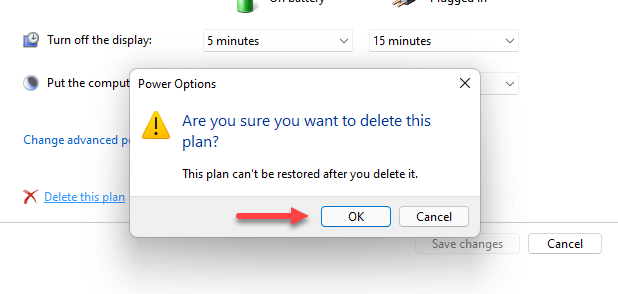
- Then select OK.
So this post was all about how to enable ultimate performance in windows 11.
Read More:

One Comment