
As you know that macOS is one of the best-operating systems along with Windows OS. However, If you’re a Windows user and want to test the macOS Ventura operating system on your Windows PC or laptop then you are in the right place. In this guide, we’ll show you how to install macOS Ventura on VMware Workstation on Windows 10/11 PC.
Meanwhile, before we get started let’s have some information about the macOS Ventura:
macOS Ventura (version 13) is Apple’s desktop operating system for Macintosh computers, and it is the nineteenth major release. It was unveiled on June 6, 2022, during WWDC 2022 as the successor to macOS Monterey. Following the naming method introduced with macOS Mavericks, it is named after Ventura, California.
On June 6, 2022, the first developer version was launched, with the public beta following in July. In the fall of 2022, the finished product will be available. For more visit here.
it will bring a slew of new capabilities to desktops and laptops. (New macOS releases are generally released in September.) There’s a totally new multitasking tool called Stage Manager, in addition to enhancements to Messages, Safari, the Mail app, and Continuity. The final version of macOS Ventura is only available as a developer beta for now, but we’ve compiled a list of the most important things to look forward to.
Is Your Mac Ready for This for macOS Ventura?
On Apple hardware that is supported, each version of macOS is available as a free upgrade. If you’re wondering if your current Mac will run Ventura, here’s a list of all the models that will:
- MacBook: 2017 and later
- MacBook Air: 2018 and later
- MacBook Pro: 2017 and later
- Mac Mini: 2018 and later
- iMac: 2017 and later
- iMac Pro: 2017 and later
- Mac Pro: 2019 and later
- Mac Studio
Top macOS Ventura Features
Stage Manager
Gestures may make switching apps easier, but it’s still all too easy to become lost in a sea of windows. Stage Manager, a new feature for macOS Ventura, seeks to make multitasking easier. Your primary window will remain in the front, while other open app windows will appear as thumbnails on the left side of your screen. Rather than placing them behind each other, the goal is to provide a quick overview of all the windows you’re working on. It will just take one click to swap. You’ll also be able to group windows together in the sidebar, which will come in handy for quickly switching between multi-app jobs.
Social browsing with shared Tab Groups in Safari
Apple’s regular suite of applications, including Safari, will get a variety of new tricks in macOS Ventura. The most significant update is the addition of shared Tab Groups. Collaborating with your coworkers? Are you thinking of doing anything with your family? Do you like to procrastinate with your friends? Create a Tab Group, and everyone in it will be able to exchange web pages, add tabs, and see what other people are looking at in real-time. As a result, you can explore as a group and become distracted at the same time. Tab Groups have their own start page and bookmarks list, as well as the ability to start Messages and FaceTime conversations directly from Safari.
Make your iPhone a webcam with a Continuity Camera
In recent years, Mac cameras have been more hit than miss. Do you want a camera that will honor your mug? If you have an iPhone, macOS Ventura will allow you to record with its superior cameras. The function, known as Continuity Camera, allows you to link your Apple smartphone with your Mac wirelessly (recent models with M1 or M2 silicon should detect it automatically).
There’s a mobile mount in the works that attaches to the lid of your laptop. After that, you’ll be able to utilize your iPhone for Center Stage framing, Portrait mode depth of field effects, and the new Studio Light, which dims the background and highlights your face. Do you want to make demo videos? The upcoming Desk View app will use your iPhone’s Ultra-Wide camera to capture a view of your workstation at the same time. For more visit here.
How to Install macOS Ventura on VMware on Windows 10/11 PC
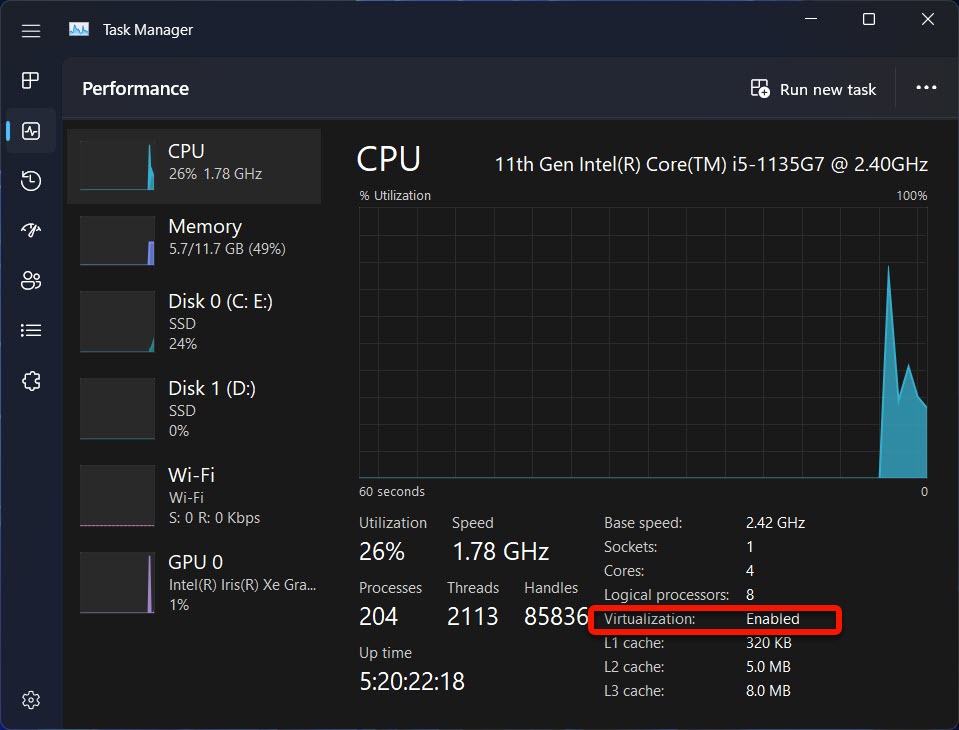
Note: Before installing macOS Ventura on VMware Workstation, make sure to enable Virtualization Technology from BIOS.
To install the macOS Ventura on VMware Workstation in Windows 10/11, you’ll need to download some required files.
Here are the required Files:
- Download macOS Ventura ISO
- Download VMware Workstation 16 Pro
- Download the macOS Unlocker V3 for VMware
Step #1: Install VMware on Windows 10/11 PC
With Fusion for the Apple Mac and Workstation Player for the PC, VMware has a wide range of virtualization options to choose from. Despite the differences in names, these two programs provide essentially the same service, though customized to each host OS.
For the Mac, there’s a nifty feature called ‘Unity Mode,’ which allows Mac OS to run Windows apps from the Dock and have them seem as if they’re part of the host OS. Workstation, as its version number implies, is a more mature product that offers one of the most comprehensive virtualization solutions ever.
It allows CAD and other GPU-accelerated apps to run under virtualization since it is one of the few hosts that supports DirectX 10 and OpenGL 3.3. Workstation Player for Windows or Linux is free for personal use, but corporate users and those who wish to operate restricted VMs created with Pro or Fusion Pro will need to upgrade to Pro.

Step #2: Unlock VMware to Install macOS
Note: Before unlocking the VMware, make sure to completely close and exit the VMware Workstation virtual machine.
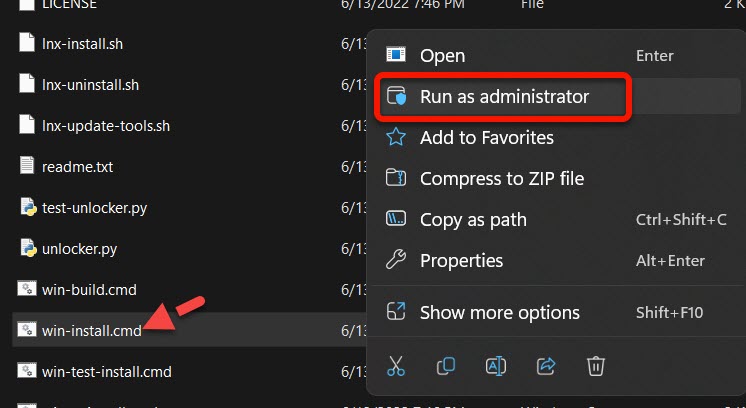
Now, download the VMware Unlocker from the above-mentioned link and extract it.
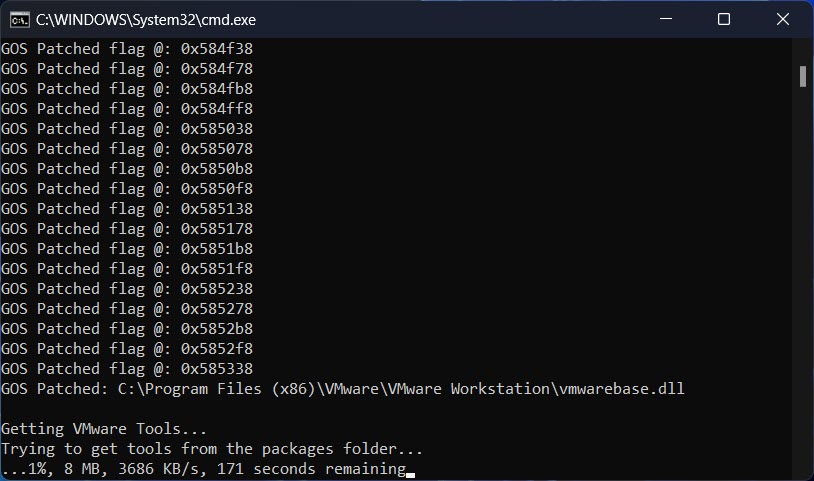
Right-click on win-install.cmd and click Run as Administrator.
Now, wait for a while until the downloading process is to be completed.
Step #3: Create macOS Ventura Virtual Machine
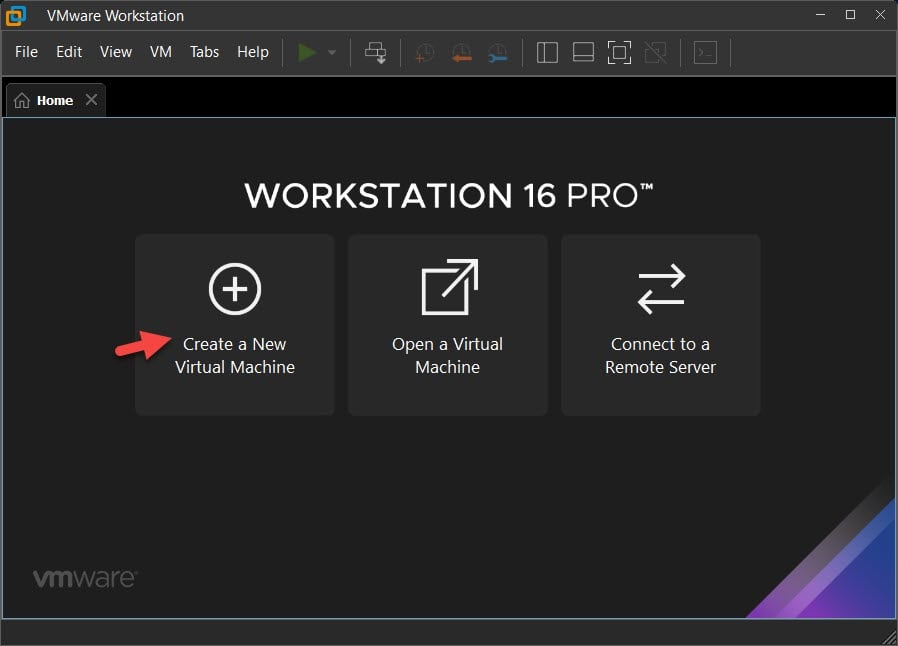
Open VMware and then select Create a New Virtual Machine.
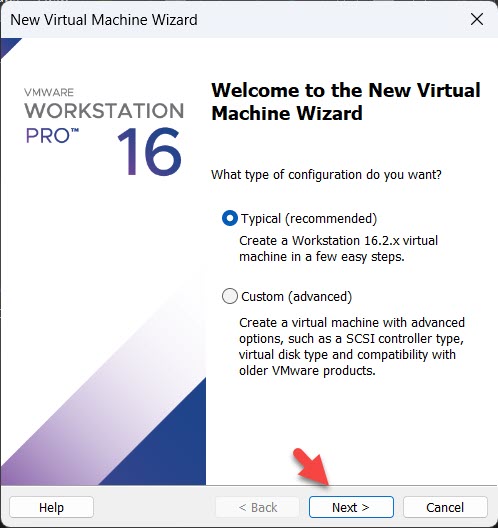
Select the Typical (recommended) option and then click Next.
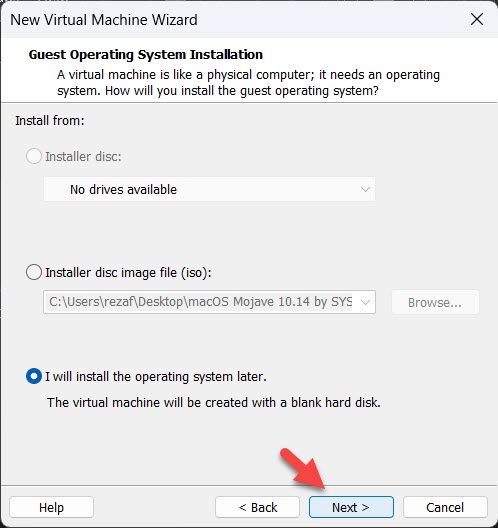
Select I will install the operating system later and then click Next.
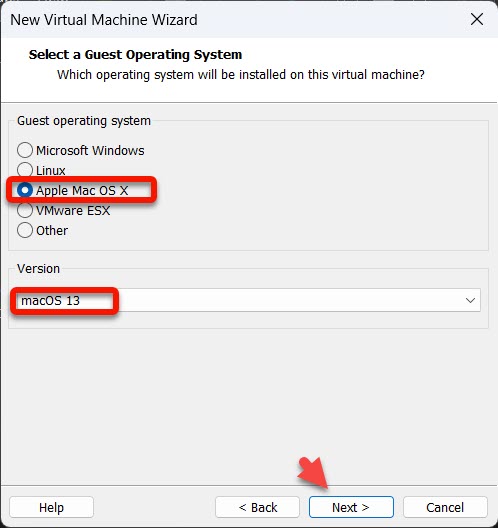
Select Apple Mac OS X under the Guest operating system and select macOS 13 as the version and then click Next.
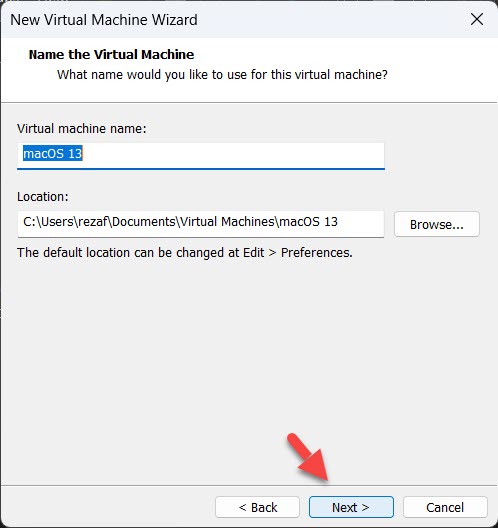
Type the virtual machine name and then click Next. You can type the virtual machine such as macOS Ventura or macOS 13.
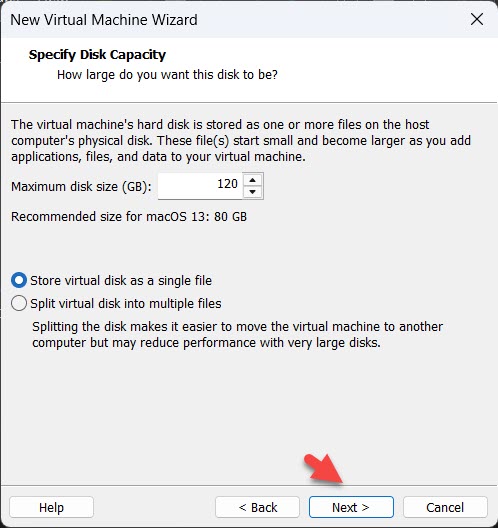
Allocate the disk size, select Store virtual disk as a single file, and then click Next.
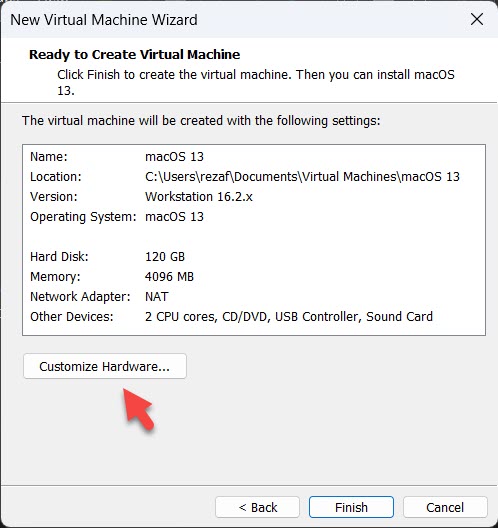
Step #4: Edit and Customize Virtual Machine
Select Customize Hardware.
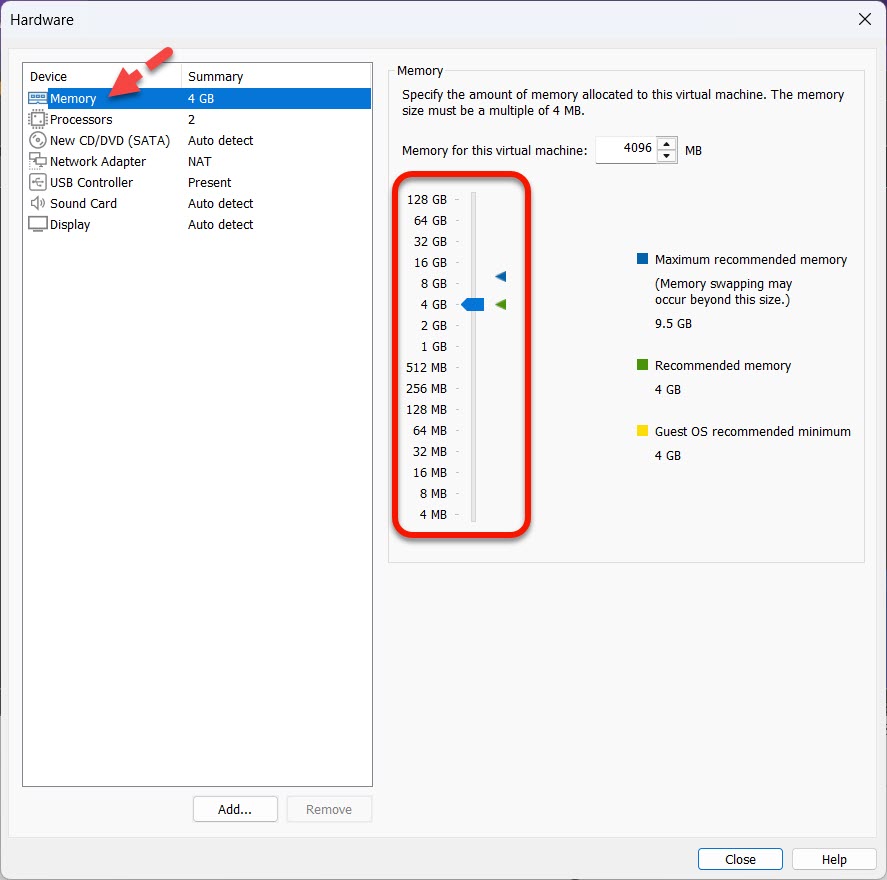
Allocate the RAM size. You can allocate up to 128 GB.
Select the Processors tab then increase the CPU processor core.

Click New CD/DVD (SATA), select Use ISO image file, and then click Browse.
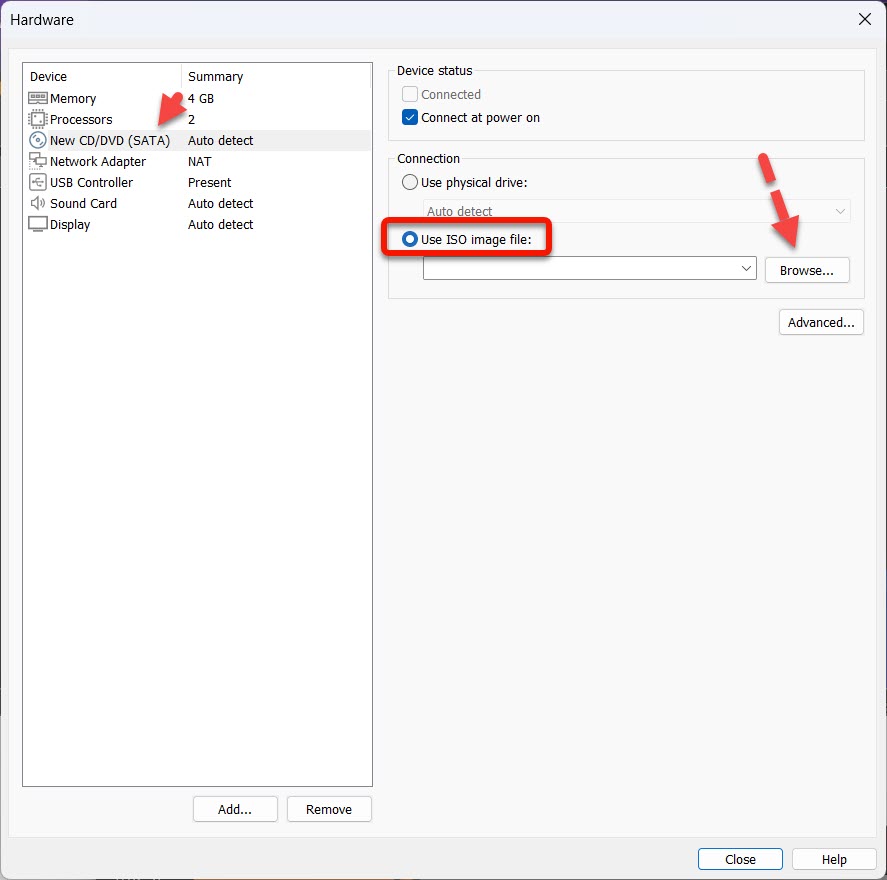
Locate the macOS Ventura ISO file and then select Open.

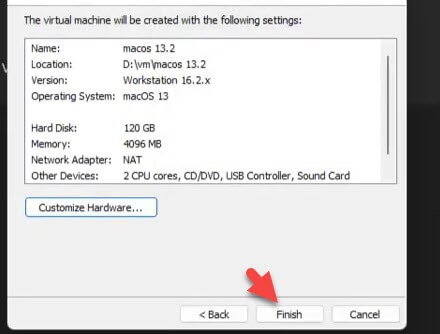
At last, select Close and Finish.
Step #5: Edit macOS Ventura VMX File
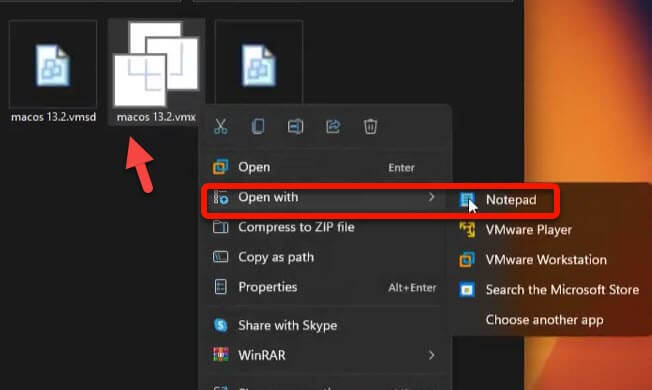
Press Win key+ E to open File Explorer, navigate to the Documents > Virtual Machines > macOS Ventura and it might be different in your case. Then open the VMX file using Notepad.
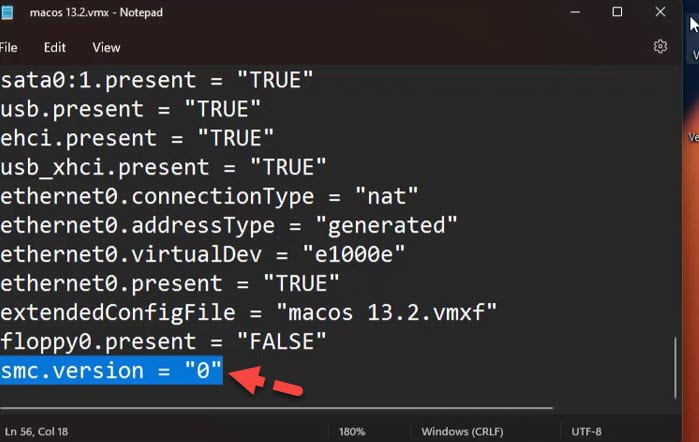
Scroll down to the bottom of texts and add the following code and select Save:
smc.version = “0”
Step #6: Start the macOS Ventura Virtual Machine
Launch the VMware and select the macOS Ventura virtual machine and then click Power on this virtual machine.
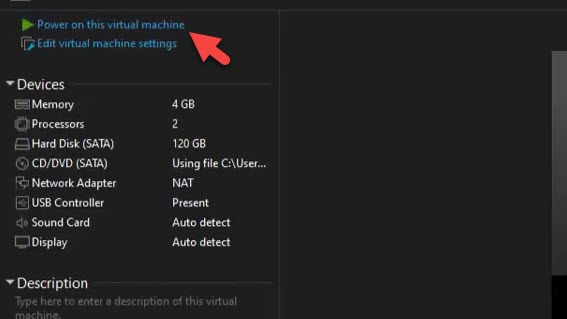
Wait for it to boot up.
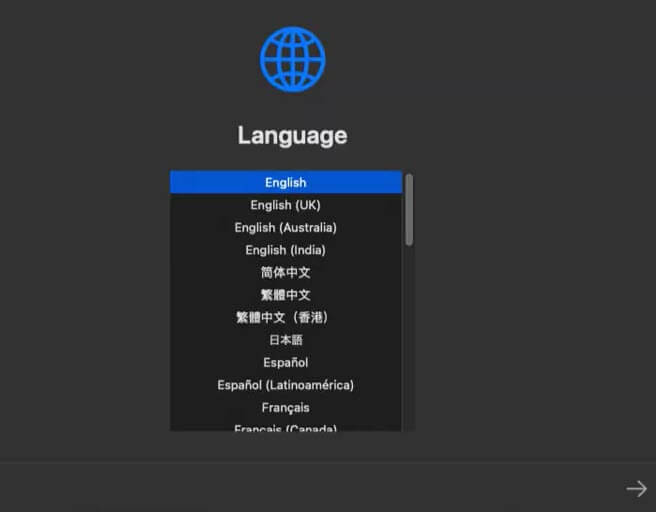
Select your preferred language and then click the arrow icon at the bottom right-hand corner.
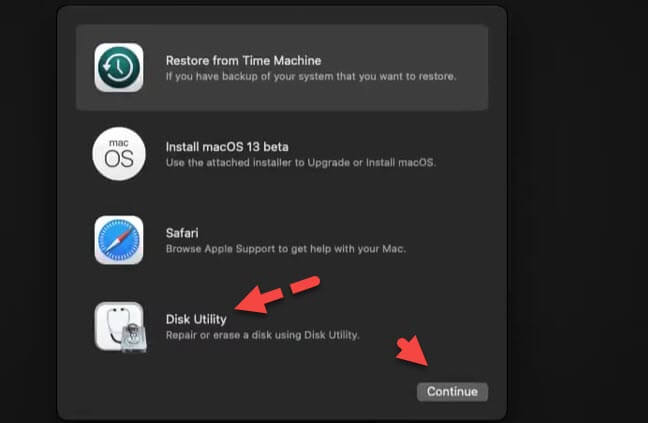
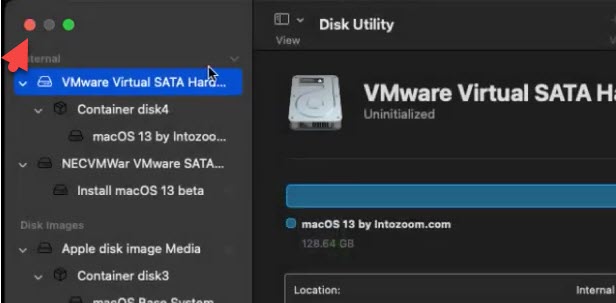
Select Disk Utility and click Continue.
Select VMware Virtual SATA Hard Drive Media then click Erase.
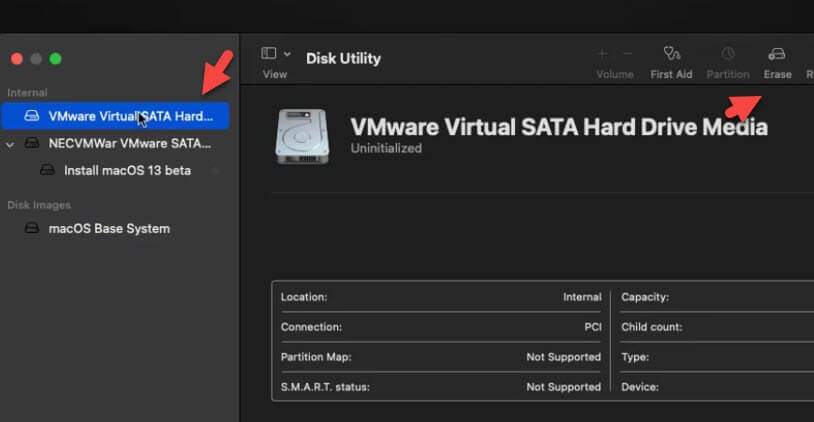
Erase the hard drive with the following parameters.
- Name: macOS 13
- Format: APFS
- Scheme: GUID Partition Map
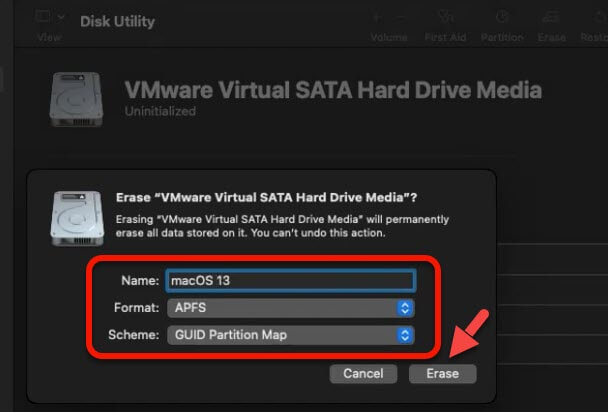
Click Done.
Click on the Disk Utility tab and select Quit Disk Utility.
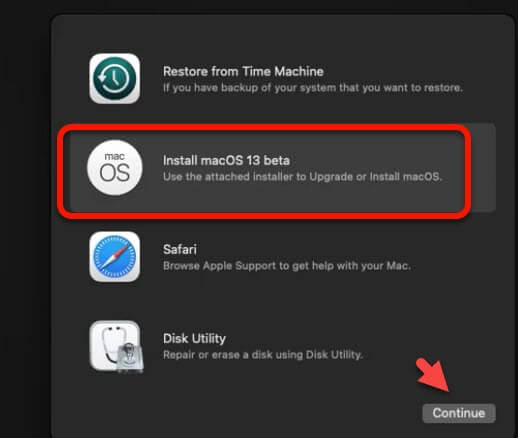
Select Install macOS 13 beta and click Continue.
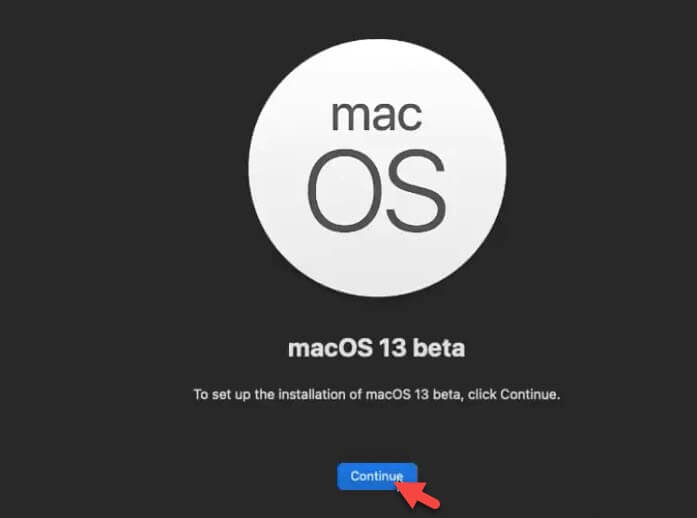
Click Continue and Agree.
Select the macOS Ventura disk then click Continue.

Now, for a while. It will take about 45 to 1 hour.

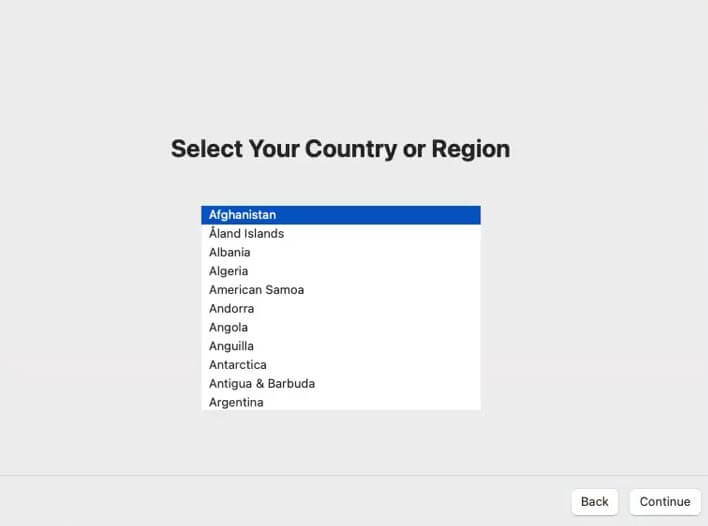
Step #7: Setup & Complete Basic macOS Ventura Account Settings
- Choose your language, keyboard layout, and country.
- In the Accessibility window, click Not Now.
- Configure the settings regarding the Internet and go on.
- Agree with that and privacy.
- On the migration page, click Not Now.
- Agree with terms and conditions.
- Create a computer account. Enter your full name and password and click Continue.

- Next, click continue.
- Configure Screen Time and Siri.
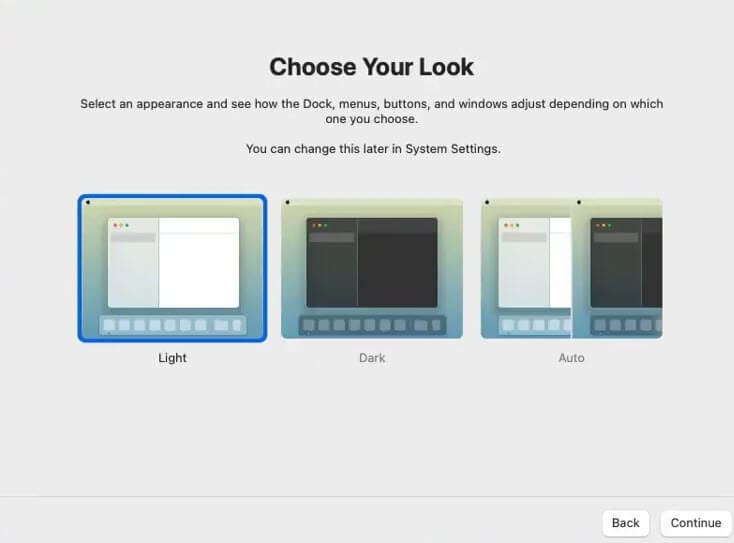
- Choose a theme, Dark Mode, Light Mode, or Auto.
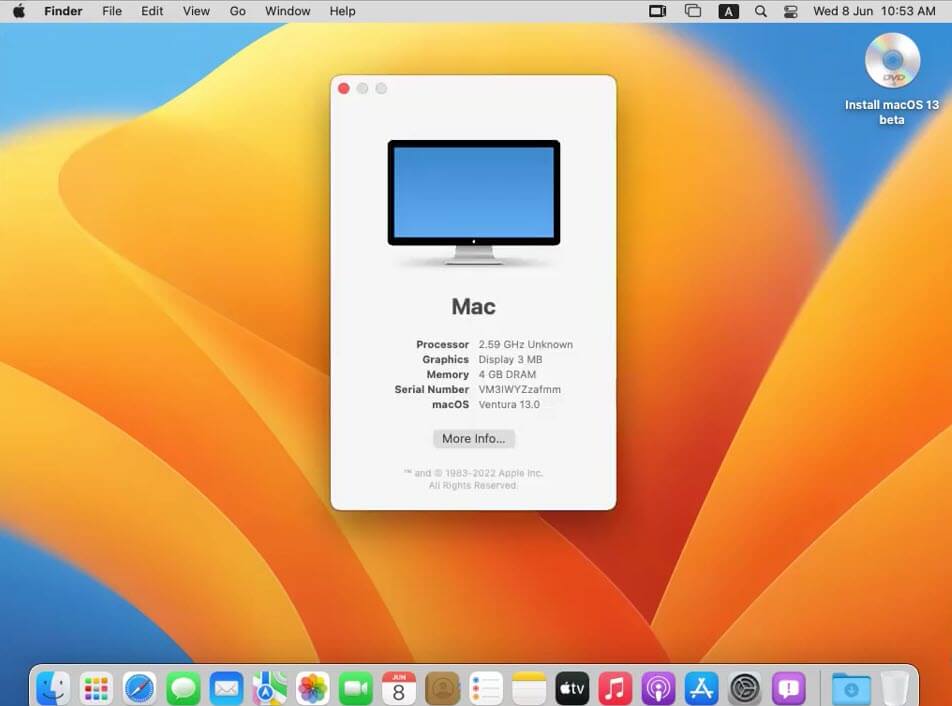
- Finally, you’ve successfully installed macOS Ventura on VMware on Windows 10/11 PC.
This was a detailed and step-by-step tutorial on how to install macOS Ventura on a Windows PC using VMware. After you’ve installed macOS Ventura, you may do whatever you want with it. You will have no trouble if you successfully follow all of the procedures. However, I hope you found this advice to be helpful. Please do not hesitate to post comments in the comment section below if you have encountered any difficulties. Your suggestions and opinions will be very welcomed, and we will be delighted to hear them.
How to Install macOS Big Sur on VMware in Windows 10
How to Make macOS Ventura Bootable USB on Windows 10/11 PC
I get a boot loop after the installation completes just before you create an account.