

As you know that macOS is one of the best-operating systems along with Windows OS. However, If you’re a Windows users and want to test the macOS operating system on your Windows PC or laptop then you are in the right place. In this guide, we’ll show you how to install macOS Big Sur on VMware Workstation in Windows 10.
Meanwhile, before we get started let’s have some information about the macOS Big Sur:
macOS Big Sur
macOS Big Sur, which was announced at WWDC in June 2020, is the newest version of macOS and was launched on November 12. macOS Big Sur has a new appearance, and it’s such a significant upgrade that Apple increased the version number to 11. That’s true, macOS Big Sur is the same as macOS 11.0.
With macOS Big Sur, Apple released the most significant design upgrade to macOS since the debut of Mac OS X, revamping everything from the curvature of window edges to colours and dock icon styles. The new style was intended to seem both fresh and familiar.
The Dock has been made more translucent, app icons have a new uniform squircle shape, menu bars in apps have been redesigned to make them less obtrusive and better able to blend in with your content, system sounds have been completely redone, and there are new symbols in toolbars, sidebars, and controls to provide a cleaner look.
The customizable menu bar provides access to a customizable Control Center that houses Wi-Fi, Bluetooth, and AirDrop controls, keyboard brightness, Do Not Disturb, Dark Mode, sound level, and more, and the customizable menu bar offers access to a customizable Control Center that houses Wi-Fi, Bluetooth, and AirDrop controls, keyboard brightness, Do Not Disturb, Dark Mode, sound level, and more.
The Notification Center has been updated to include more interactive notifications organised by the app, as well as iOS-style widgets that can be customised in three sizes. The new design of core applications makes it easier to interact with programmes and better organises many open windows.
Note: Before installing macOS Big Sur on VMware Workstation, make sure to enable Virtualization Technology from BIOS.

How to Install macOS Big Sur on VMware in Windows 10
To install the macOS Big Sur on VMware Workstation in Windows 10, you’ll need to download some required files.
Here are the required Files:
- Download macOS Big Sur ISO
- Download VMware Workstation 16 Pro
- Download the macOS Unlocker V3 for VMware
Step #1: Install VMware on Windows 10
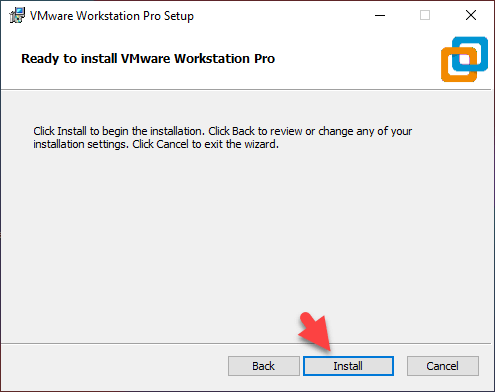
With Fusion for the Apple Mac and Workstation Player for the PC, VMware has a wide range of virtualization options to choose from. Despite the differences in names, these two programmes provide essentially the same service, though customised to each host OS.
For the Mac, there’s a nifty feature called ‘Unity Mode,’ which allows Mac OS to run Windows apps from the Dock and have them seem as if they’re part of the host OS. Workstation, as its version number implies, is a more mature product that offers one of the most comprehensive virtualization solutions ever.
It allows CAD and other GPU-accelerated apps to run under virtualization since it is one of the few hosts that supports DirectX 10 and OpenGL 3.3. Workstation Player for Windows or Linux is free for personal use, but corporate users and those who wish to operate restricted VMs created with Pro or Fusion Pro will need to upgrade to Pro.
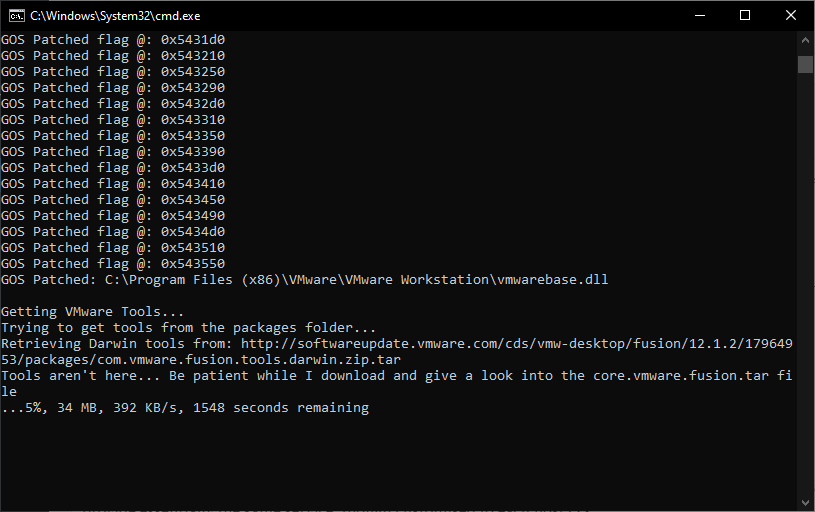
Step #2: Unlock VMware to Install macOS Big Sur on Windows
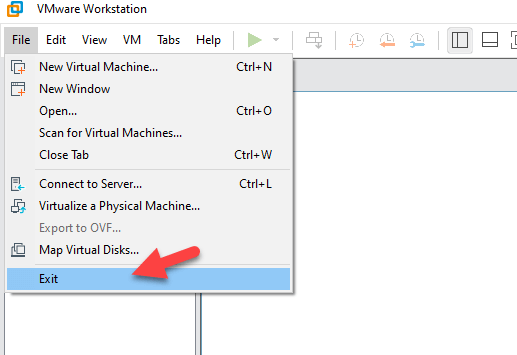
Before unlocking the VMware, make sure to completely close and exit the VMware Workstation virtual machine.
Now, download the VMware Unlocker from the above-mentioned link and extract it.

Right-click on win-install.cmd and click Run as Administrator.
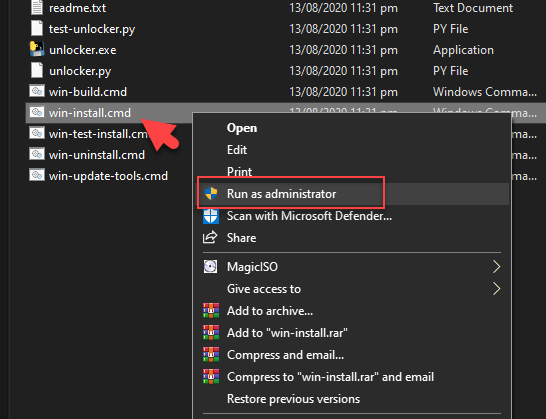
Now, wait for a while until the downloading process is to be completed.
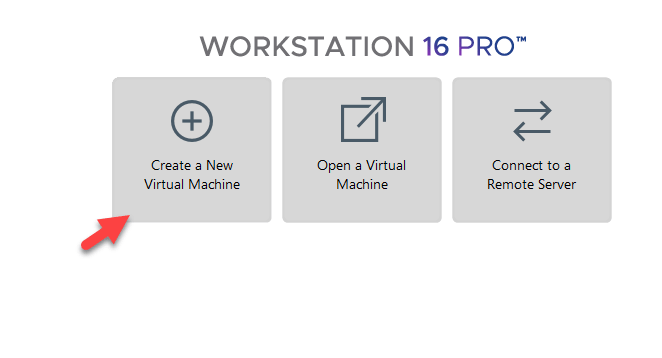
Step #3: Create a New Virtual Machine
Open VMware and then select Create a New Virtual Machine.
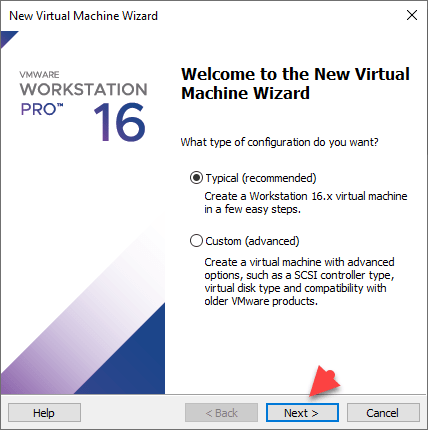
Select the Typical (recommended) option and then click Next.
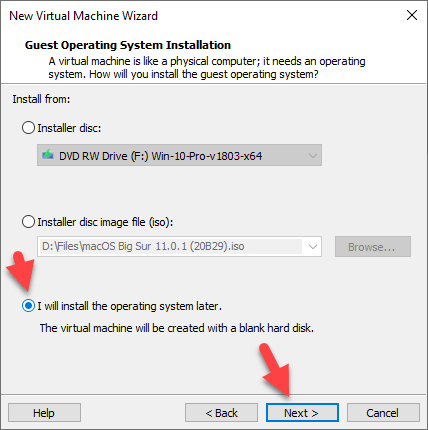
Select I will install the operating system later and then click Next.
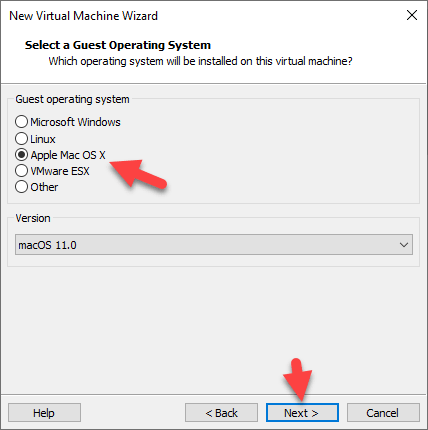
Select Apple Mac OS X under the Guest operating system and select 11.0 as the version and then click Next.
Type the virtual machine name and then click Next. You can type the virtual machine such as macOS Big Sur or macOS 11.0.

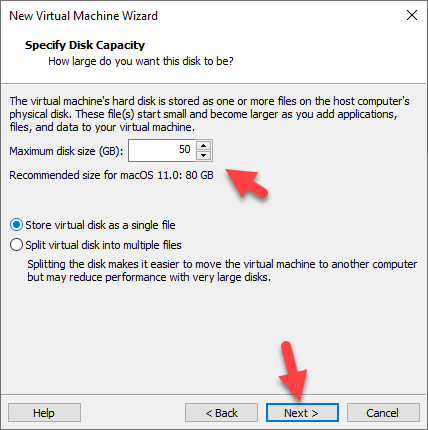
Allocate the disk size, select Store virtual disk as a single file and then click Next.
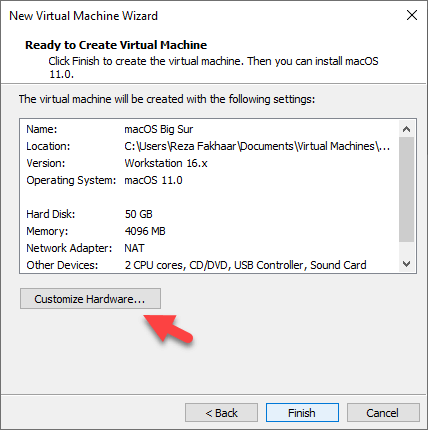
Step #4: Edit and Customize Virtual Machine
Select Customize Hardware.
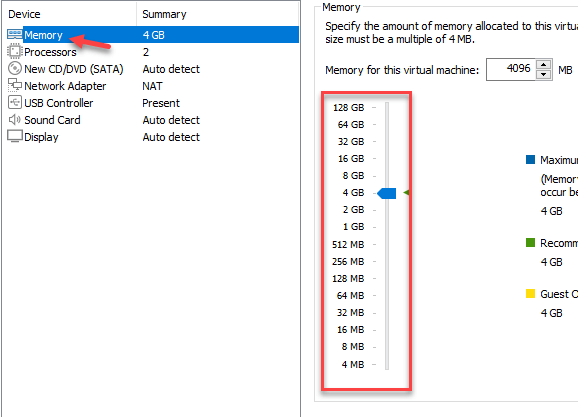
Allocate the RAM size. You can allocate up to 128 GB.
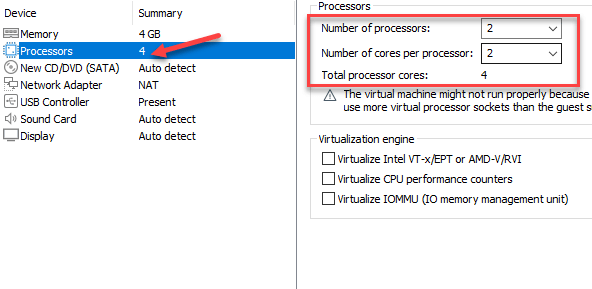
Select Processors tab then increase the CPU processor core.
Click New CD/DVD (SATA), select Use ISO image file and then click Browse.
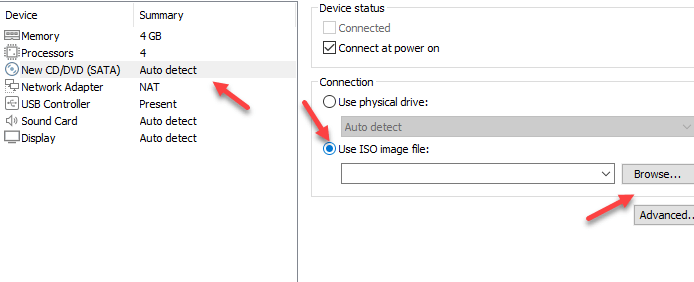
Locate the macOS Big Sur ISO file and then select Open.

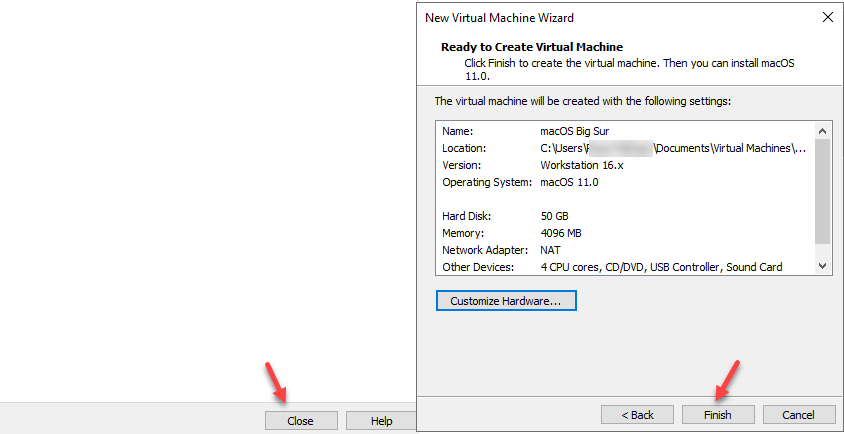
At last, select Close and Finish.
Step #5: Edit macOS Big Sur VMX File
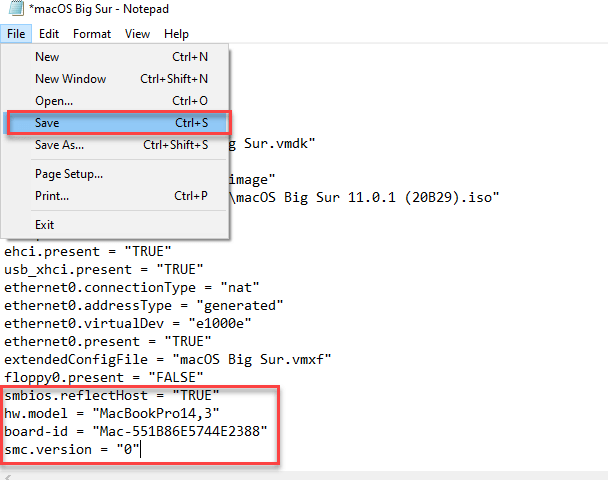
Press Win key+ E to open File Explorer, navigate to the Documents > Virtual Machines > macOS Big Sur and it might be different in your case. Then open the VMX file using Notepad.

Scroll down to the bottom of texts and add the following code and select Save:
smbios.reflectHost = "TRUE"

hw.model = "MacBookPro14,3"

board-id = "Mac-551B86E5744E2388"

smc.version = "0"
Step #6: Start the macOS Big Sur Virtual Machine
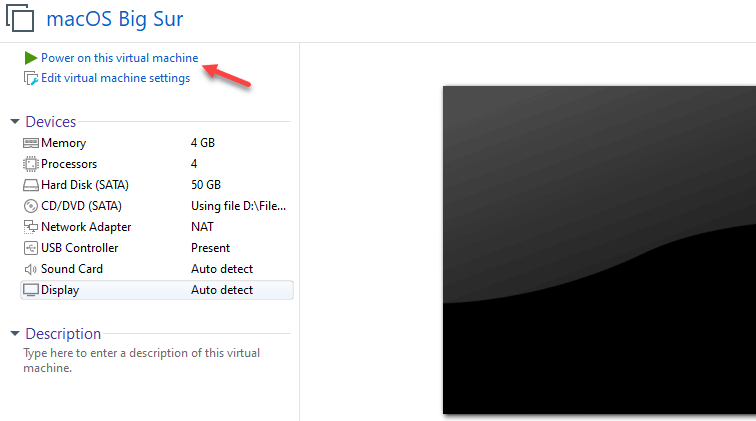
Launch the VMware and select the macOS Big Sur virtual machine and then click Power on this virtual machine.
Wait for it to boot up.

Select your preferred language and then click the arrow icon at the bottom right-hand corner.

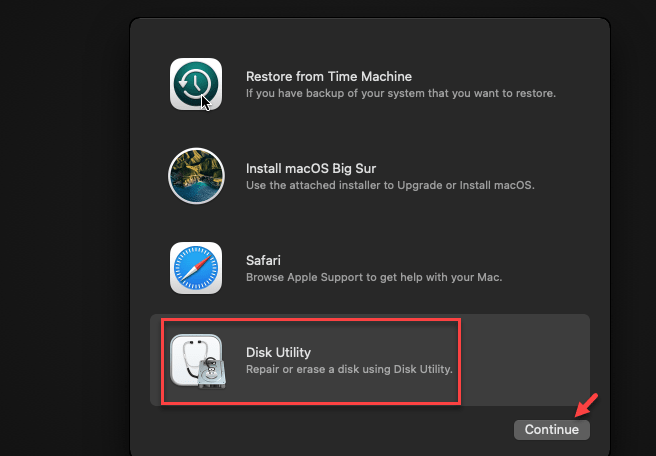
Select Disk Utility and click Continue.
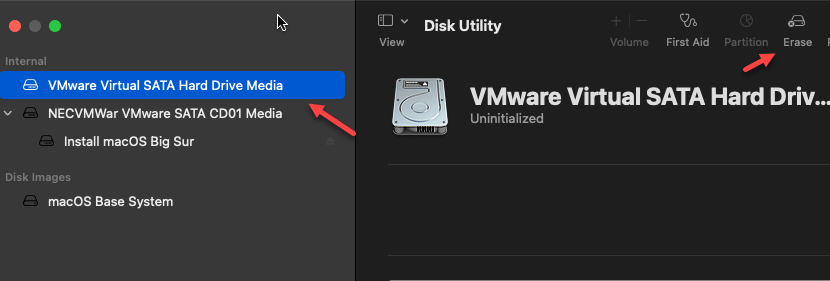
Select VMware Virtual SATA Hard Drive Media then click Erase.
Type the Name like macOS Big Sur, select APFS for the Format and select GUID Partition Map for the Scheme and click Erase.

Click Done.
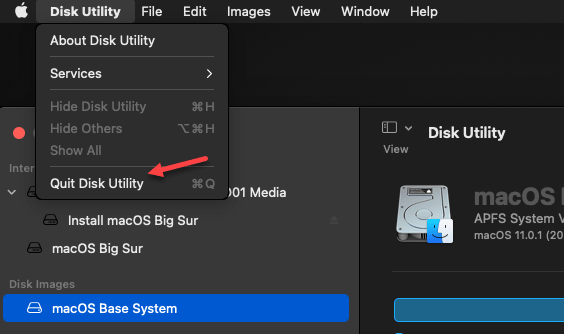
Click on the Disk Utility tab and select Quit Disk Utility.
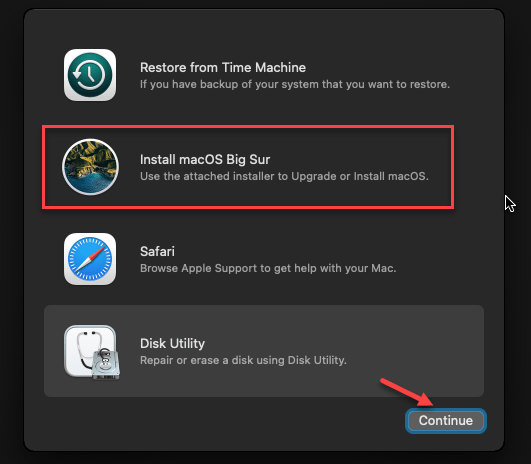
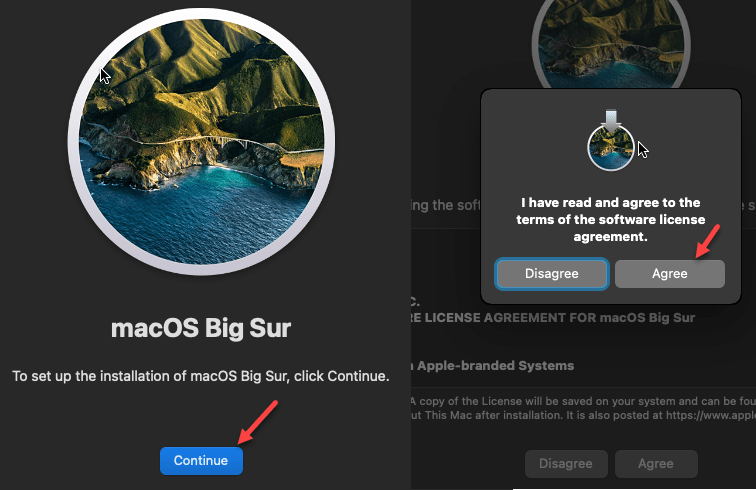
Select Install macOS Big Sur and click Continue.
Click Continue and Agree.
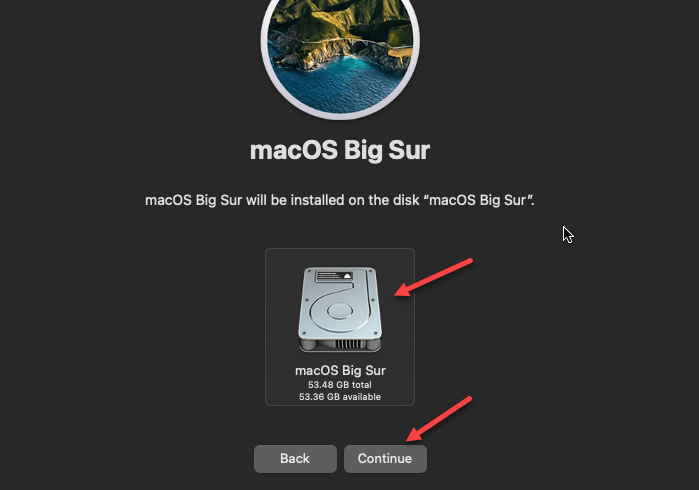
Select the macOS Big Sur disk then click Continue.
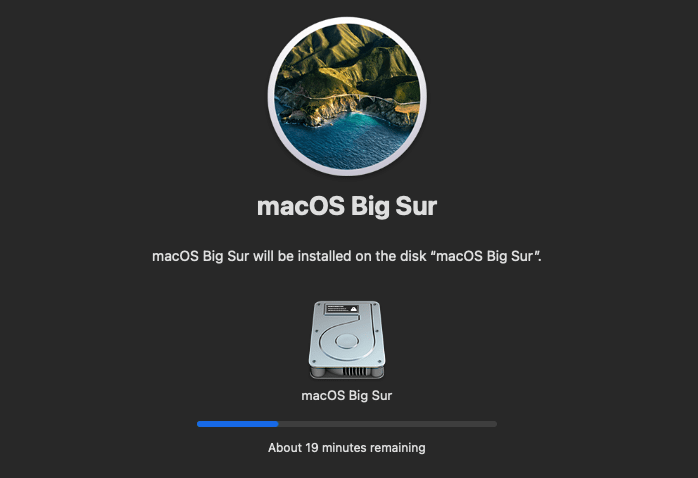
Now, for a while. It will take about 20 to 30 minutes.
Step #7: Setup & Complete Basic macOS Account Settings
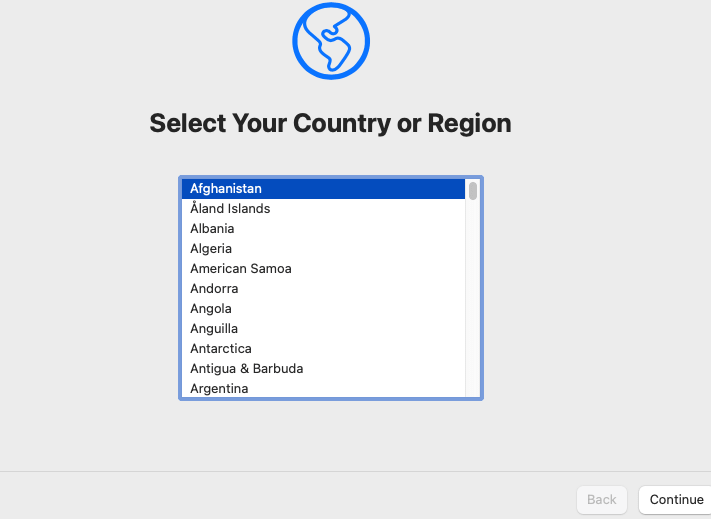
Select your country/region and click Continue.
Select your preferred language and input sources and click Continue.
On Accessibility page, select Not Now.
On Date & Privacy page, select Continue.
Click Not Now on Migration Assistant page.
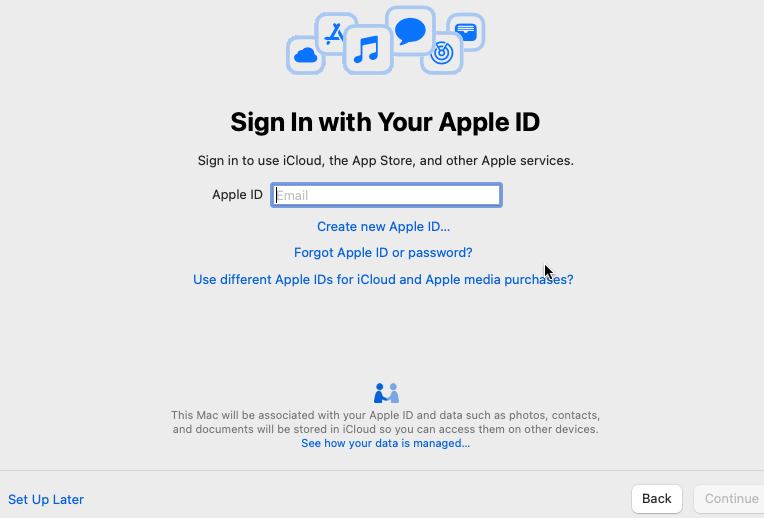
Select Set Up Later on the Sign in with Your Apple ID screen and select Skip. However, if you’ve Apple ID then Enter it and follow the on screen instructions.
Agree to Terms and Conditions.
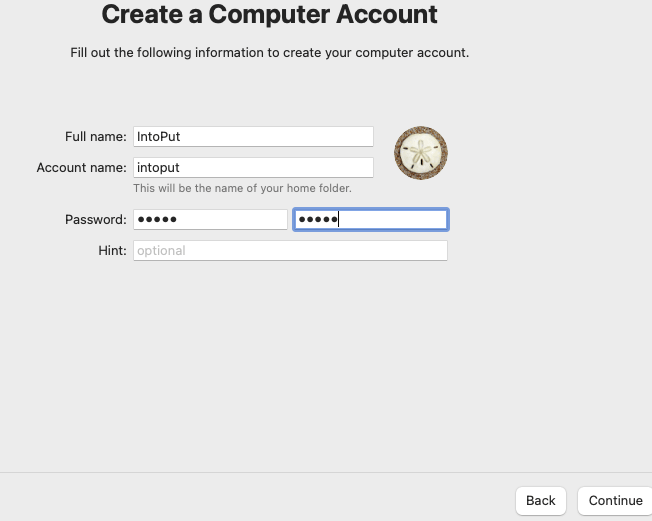
Create a computer account. Enter full name and password and click Continue.
Select Continue on the Express Set Up screen.
Select Continue on the Analytics page as well.
Select Set Up Later on the Screen Time screen.
Select your preferred look: Light, Dark and Auto and click Continue.

Setting Up Your Mac.

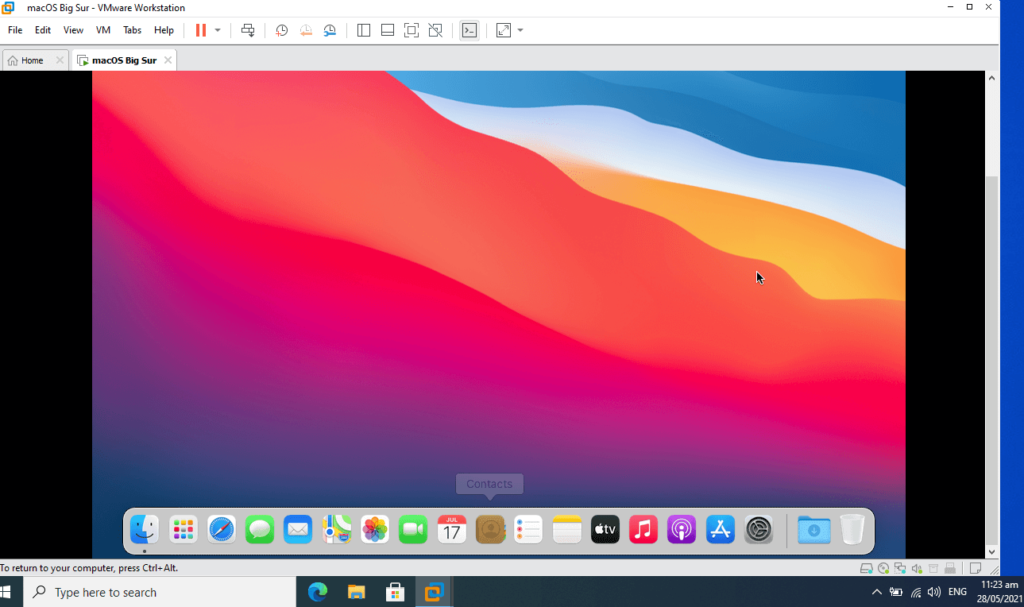
Finally, you’ve successfully installed macOS Big Sur on Vmware in Windows 10.
This was a detailed and step-by-step tutorial on how to instal macOS Big Sur on a Windows PC using VMware. After you’ve installed macOS Big Sur, you may do whatever you want with it. You will have no trouble if you successfully follow all of the procedures. However, I hope you found this advice to be helpful. Please do not hesitate to post comments in the space below if you have encountered any difficulties. Your suggestions and opinions will be very welcomed, and we will be delighted to hear them.
Read More:
How to Delete a Virtual Machine on VMware and VirtualBox in Windows 10
How to Install Windows 11 on VMware Workstation in Windows 10
2 Comments